How to build a pergola with roof
How to Build a Pergola with Roof: A Comprehensive Guide
Building a pergola with a roof is an excellent way to enhance your outdoor living space. Whether you want to create a cozy nook for relaxation or an ideal spot for entertaining guests, a pergola adds beauty and functionality to your yard. In this guide, we will walk you through the essential steps to construct your own pergola, complete with a roof for shade and shelter.
Understanding the Benefits of a Pergola
Before diving into the construction process, it's beneficial to understand why you might want to build a pergola with a roof. Here are some advantages:
- Increased Shade: A roof allows you to enjoy your outdoor area even on sunny days.
- Weather Protection: It protects furniture and appliances from rain.
- Enhanced Aesthetics: A well-designed pergola can significantly improve your yard's appearance.
- Versatility: Use it as a framework for climbing plants, lighting, and curtains.
Materials Needed
Before you begin building your pergola, you'll need a list of materials that will ensure a successful project. Here’s what you might need:
- Wood beams (cedar, redwood, or pressure-treated lumber)
- Wood screws or nails
- Concrete mix for footings
- Roofing material (metal panels, polycarbonate sheets, or fabric)
- Paint or wood sealer (optional)
- Tools: saw, drill, level, measuring tape, and safety equipment
Planning Your Pergola Design
A crucial first step in the construction process is planning your pergola’s design. Consider the following aspects:
- Location: Choose a location that provides adequate sunlight and complements your landscape.
- Size: Determine the dimensions based on available space and desired functionality.
- Style: Explore different styles (modern, traditional, etc.) to match your home’s architecture.
Sketching a design can help envision how the finished pergola will look. Use basic graph paper or a design software to create a scaled version of your plan.
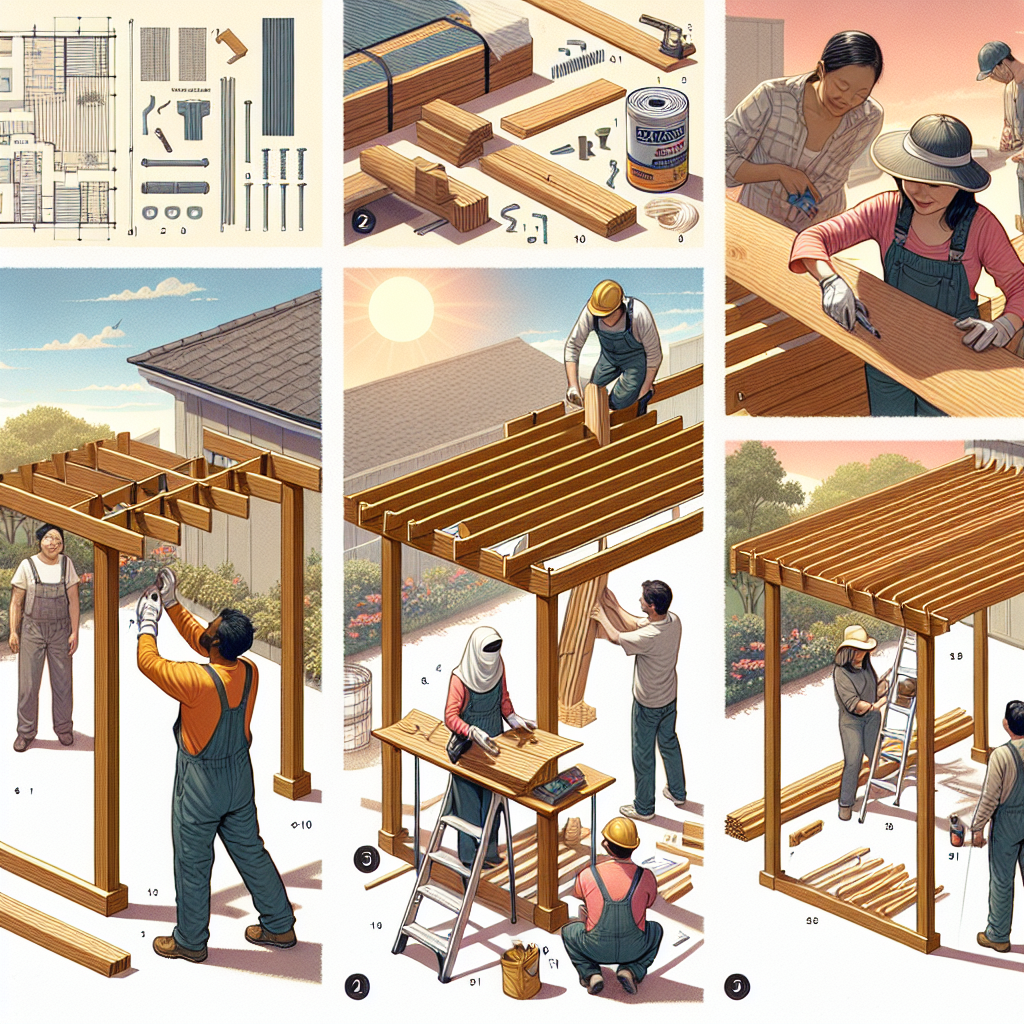
Step-by-Step Guide to Building a Pergola with Roof
Now that you’ve prepared and planned, let’s proceed with the construction process divided into manageable steps:
Step 1: Gather Your Tools and Materials
Before starting, ensure you have all the tools and materials listed above readily available. Having everything within reach will make the process smoother.
Step 2: Measure and Mark the Area
Using your measuring tape, accurately mark where you want the pergola to be. Make sure the ground is level. You can use stakes and string to outline the perimeter of your pergola.
Step 3: Dig Holes for the Posts
Typically, the height of the posts should be around 8 to 10 feet. Dig holes that are about 2 feet deep and about 12 inches wide. This depth will ensure that your pergola is stable and secure.
Step 4: Set the Posts
Place your wooden posts into the holes you’ve dug. Use a level to make sure they are vertical. Pour concrete mix into the holes, securing the posts in place. Allow the concrete to cure for at least 24-48 hours.
Step 5: Install the Beams
Once the posts are stable, it’s time to add the beams. Use wood screws or bolts to secure horizontal beams at the top of the vertical posts, ensuring they are level. These beams will serve as the foundation of your pergola’s roof structure.
Step 6: Add Roof Supports
Next, position your roof supports. Depending on your design, these can be either slatted wooden beams or a solid sheet of roofing material. Ensure that they are evenly spaced for proper load distribution.
Step 7: Choose and Install Your Roofing Material
Now comes the fun part—selecting your roofing material! If you are going for a slatted roof aesthetic, you can leave gaps between the slats. For a more solid roof, consider:
- Metal Panels: Durable and weather-resistant.
- Polycarbonate Sheets: Lets light in while providing protection against rain.
- Fabric: A more flexible option that can be drawn back when not needed.
Secure the roofing in place using screws or clips as determined by your material choice.
Step 8: Finishing Touches
After the roof is installed, you can enhance your pergola's appeal with a variety of finishing touches:
- Paint or Stain: Sealing your wood can increase durability and aesthetics.
- Lighting: Solar lights or string lights can create ambiance.
- Decor: Consider adding climbing plants or curtains for added beauty and privacy.
Maintaining Your Pergola
Once your pergola is complete, maintaining it is essential to ensure its longevity. Here are some maintenance tips:
- Regularly check for loose screws or signs of wear.
- Reapply sealant every few years to protect the wood.
- Prune any climbing plants to prevent damage.
Final Thoughts
Building a pergola with roof can significantly enhance your outdoor experience. Not only does it provide functional benefits like shade and weather protection, but it also serves as a beautiful architectural addition to your backyard. With proper planning, the right materials, and a step-by-step approach, you can create a stunning structure that transforms your outdoor space into a haven for relaxation and entertainment.
Now that you have a complete guide, it's time to grab your tools and get started on building your very own pergola!
By Guest, Published on October 8th, 2024