How to build platform steps for a deck
How to Build Platform Steps for a Deck: A Complete Guide
Building platform steps for a deck not only enhances the aesthetic appeal of your outdoor space but also adds functionality and safety. This comprehensive guide will walk you through the steps required to create sturdy and attractive deck stairs. Follow along to discover how to transform your outdoor area with well-constructed steps.
Understanding the Importance of Deck Steps
When you're constructing a deck, it's crucial to consider accessibility. **Steps** are essential for ensuring that everyone can safely navigate between different levels of your outdoor space. Well-designed steps can:
- Provide safe access to your deck.
- Enhance the overall design of your outdoor area.
- Increase property value.
- Prevent accidents and falls.
Materials Needed for Building Steps
Before you start the construction process, gather all the necessary materials. Here’s a list of what you’ll need:
- Pressure-treated lumber
- Decking boards for the treads
- Railings (if required)
- Concrete footings (if necessary)
- Wood screws and construction adhesive
- A level, measuring tape, and saw
- Safety gear (gloves, goggles, etc.)
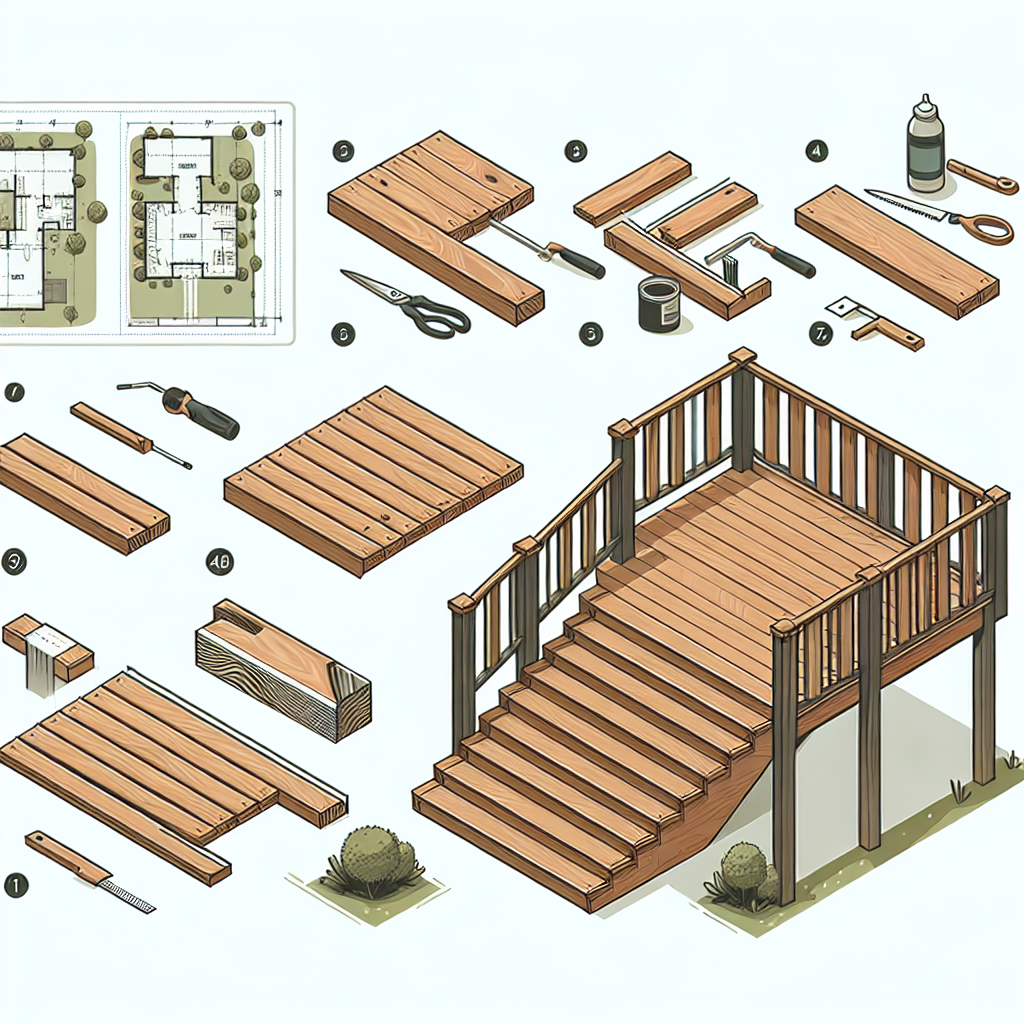
Step-by-Step Guide to Building Platform Steps for a Deck
Step 1: Plan Your Steps
Before jumping into construction, you need to plan the layout of your steps. Consider the following:
- Calculate the Rise and Run: Measure the height from the ground to the deck surface to determine the total rise.
- Determine the Number of Steps: Divide the total rise by the desired height of each step (typically 7-8 inches).
- Measure the Depth: Each step should have a tread depth of at least 10-12 inches.
"Proper planning is key to creating seamless and safe steps." - Home Improvement Expert
Step 2: Prepare the Location
Once your planning is complete, it’s time to prepare the location where the steps will be built:
- Clear the area of any debris, plants, or obstructions.
- Mark the outline of your steps using stakes and string for a clearer view of dimensions.
- If required, remove any soil to level out the base where the steps will be placed.
Step 3: Create Footings
If your steps require concrete footings, here’s how to build them:
- Dig Holes: Dig holes at each corner of the step framework, about 12 inches deep.
- Set the Footings: Pour concrete into the holes and insert footing tubes if you're using them, ensuring they're level.
- Let Cure: Allow the concrete to cure for at least 24-48 hours before proceeding.
Step 4: Build the Frame
Your next step is to build the frame for the steps:
- Using pressure-treated lumber, construct a rectangular frame that matches the outline of your steps.
- Attach the outer edges with lag screws for durability.
- Ensure the frame is square and level with the ground.
Step 5: Cut the Stringers
**Stringers** are the diagonal supports that give your steps strength and shape. Here’s how to cut them:
- Mark the Stringers: Using a framing square, mark the rise and run on your lumber. Typically, you'll want to cut a 7-inch rise and a 10-inch run.
- Cut the Lumber: Carefully cut along the lines you’ve marked, making sure to create the correct angle for the steps.
- Check for Consistency: Ensure all stringers are identical in size for uniformity.
Step 6: Attach the Stringers
After creating the stringers, it’s time to attach them to the frame:
- Position the stringers inside the frame, using screws to secure them.
- Attach the top of the stringers to the deck frame for added stability.
- Use a level to ensure everything is straight and secure.
Step 7: Install Treads
The **treads** are the flat surfaces of the steps that you step on. Here’s how to install them:
- Measure the Depth: Each tread should extend beyond the stringers for safety.
- Cut the Decking Boards: Cut your decking boards to the correct width based on the number of steps.
- Attach the Treads: Screw the decking boards to the top of the stringers, ensuring they are flush with the front edge.
Step 8: Add Railings (If Necessary)
Railings can enhance safety, especially for deeper steps. Here’s how you can add them:
- Measure and cut the vertical posts for the railings.
- Secure the posts to the outside edges of your steps.
- Add horizontal railing boards for support, ensuring they are installed at a comfortable height.
Step 9: Finishing Touches
Once the basic structure is complete, it's time for the finishing touches:
- Smooth out all edges with sandpaper to prevent splinters.
- If desired, apply a weather-resistant stain or paint for protection.
- Regularly inspect the steps for any wear and tear and perform maintenance as needed.
Maintenance Tips for Deck Steps
To keep your deck steps in prime condition, consider these maintenance tips:
- Regularly check for loose screws or nails, tightening them as needed.
- Replace any damaged or rotting wood promptly.
- Clean the steps periodically to remove dirt and algae that can cause slips.
Conclusion
Constructing platform steps for a deck can seem like a daunting task, but with careful planning and execution, it can be a rewarding project. Not only do they beautify your deck, but they also provide safety and functionality for you and your guests. Always prioritize safety by following building codes and guidelines. With this guide, you should feel empowered to tackle your own deck steps project!
Happy building!
By Guest, Published on August 24th, 2024