How to build your own sauna
How to Build Your Own Sauna: A Comprehensive Guide
Imagine stepping into your very own sauna after a long day, feeling the warmth enveloping you while the stresses of the day melt away. If you've ever thought about building your own sauna but didn't know where to start, you're in luck. This guide will walk you through the essential steps, materials, and considerations necessary for creating your personal oasis of relaxation.
Understanding the Different Types of Saunas
Before diving into the construction process, it's crucial to understand the different types of saunas available. This will help you determine which style aligns best with your preferences and budget.
- Traditional Finnish Sauna: This type uses a wood-burning stove or electric heater to warm the air. It's typically characterized by wooden benches, cedar or spruce wood, and can be quite spacious.
- Infrared Sauna: Instead of heating the air, infrared saunas use infrared lamps to directly warm your body. They tend to operate at lower temperatures and may require less energy.
- Steam Room: Usually built with tiles and sealed with water-resistant materials, a steam room generates a high-humidity environment through steam showers, differing significantly from the dry heat of traditional saunas.
Planning Your Sauna Project
Once you have a basic understanding of the types of saunas, the next step is planning your project meticulously. Here are key considerations:
1. Location
Choosing the right location for your sauna is vital. It should be an accessible and relaxing space, ideally in your backyard or basement. Ensure that the area can be adequately ventilated and has a power source if you opt for an electric heater.
2. Size
The size of your sauna will determine the overall cost and materials needed. Here are some common dimensions:
| Sauna Size | Number of People | Approximate Dimensions (ft) |
|---|---|---|
| Small | 2-3 | 4 x 6 |
| Medium | 4-6 | 6 x 8 |
| Large | 6-8 | 8 x 10 |
3. Budget
Establishing a budget beforehand will help you make informed choices. Here are the primary costs associated with building a sauna:
- Materials (wood, insulation, framing)
- Heating source (electric heater or wood stove)
- Wiring and ventilation materials
- Labor (if hiring help)
Gathering Materials
Once you have a plan, it's time to collect the necessary materials to bring your sauna to life. Below is a list of essentials:
Essential Materials
- Wood: Cedar is the most commonly recommended wood due to its natural resistance to moisture and its appealing aroma.
- Insulation: Fiberglass insulation works well to retain heat and keep the sauna energy-efficient.
- Heater: Choose between an electric heater or a wood-burning stove based on your preference.
- Heating Elements: If you’re building an infrared sauna, you will need infrared heaters.
- Flooring: Non-slip, water-resistant materials are critical for safety.
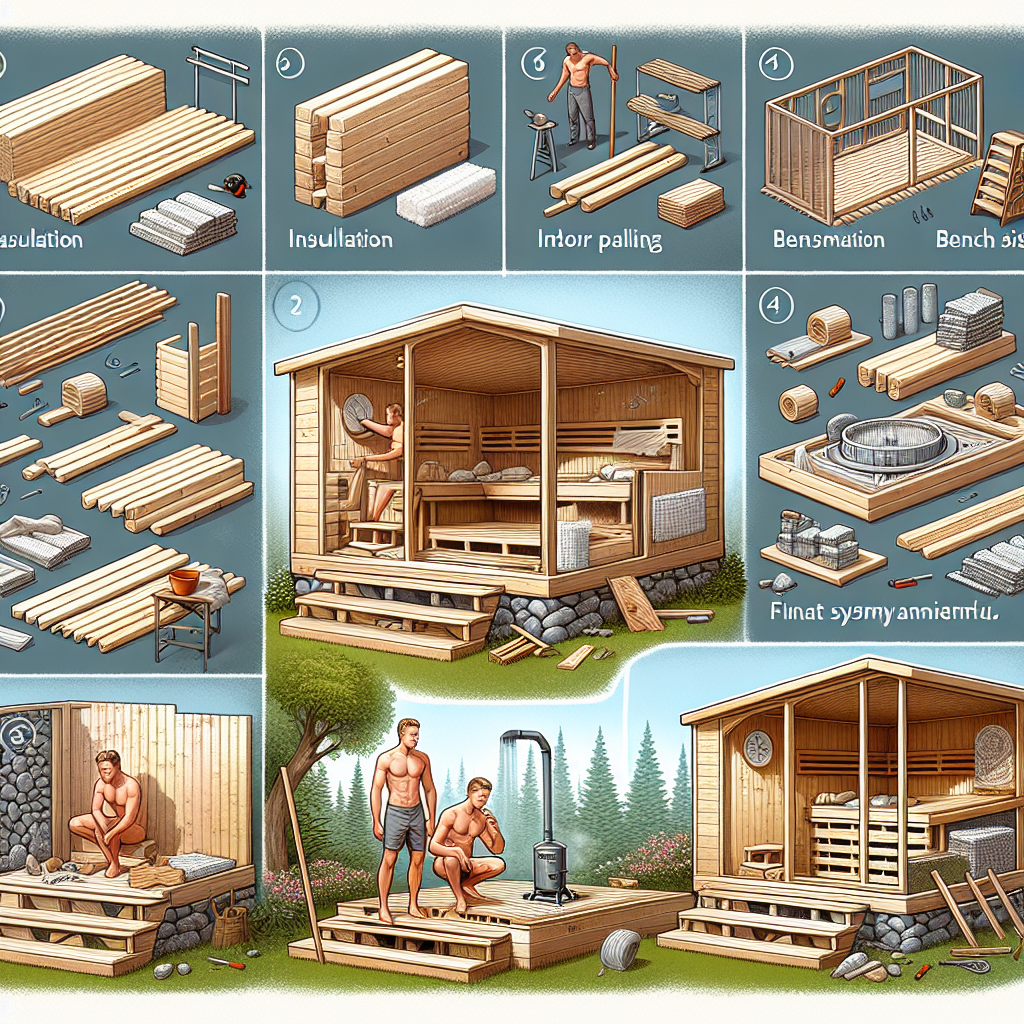
Constructing Your Sauna
With your materials ready and the plan in hand, it's time to start building. Follow these essential steps:
Step 1: Construct the Frame
Begin by constructing the frame of the sauna using 2x4 lumber. You will need to create walls and a roof structure. Refer back to your dimensions for accuracy.
Step 2: Insulate the Walls
Once your frame is up, it’s time for insulation. Insulate all walls and the ceiling using fiberglass insulation to ensure your sauna maintains heat efficiently.
Step 3: Install the Paneling
Using your chosen wood, panel the inside walls of the sauna. Cedar is ideal because it absorbs moisture without warping. Ensure the paneling allows for expansion and contraction.
Step 4: Install the Heater
Follow the manufacturer's instructions to install your heater properly. If you’re using an electric heater, ensure that hiring a qualified electrician to connect the power safely is part of your plan.
Step 5: Build Benches
Construct benches inside the sauna using sturdy wood. The top bench should ideally be higher to allow for a layered seating arrangement suitable for heat and comfort.
Step 6: Ventilation
Proper ventilation is crucial in maintaining airflow and temperature regulation. Create holes at the bottom and top of the sauna walls, ensuring that you have a working air exchange system.
Step 7: Final Touches
Finish your sauna by sealing the wood, installing any required lighting, and adding any extra features like towel racks. Make sure to create a door that seals well to prevent heat loss.
Maintaining Your Sauna
After building your sauna, maintenance will ensure it lasts longer and operates efficiently. Here are some tips:
- Regular Cleaning: Wipe down surfaces after each use to prevent moisture buildup.
- Check Heater: Regularly inspect the heater for any signs of wear and tear.
- Wood Treatment: Treat the wood with special oils or sealants to maintain its integrity.
Conclusion: Your Personal Sanctuary Awaits
Building your own sauna can be a rewarding experience that enhances your home life and personal wellness routine. From the initial planning phase to the final touches, careful consideration and execution will lead you to a beautifully constructed retreat right in your own backyard or basement.
So, whether you're looking to unwind after a hectic day, promote relaxation, or even improve your health through regular sauna sessions, this guide has provided you with the knowledge necessary to take on the task successfully. Now, go start your project and create a sauna that reflects your style and enhances your everyday life!
"A sauna is a sanctuary, a place to cleanse the body and calm the mind." - Anonymous
By Guest, Published on September 20th, 2024