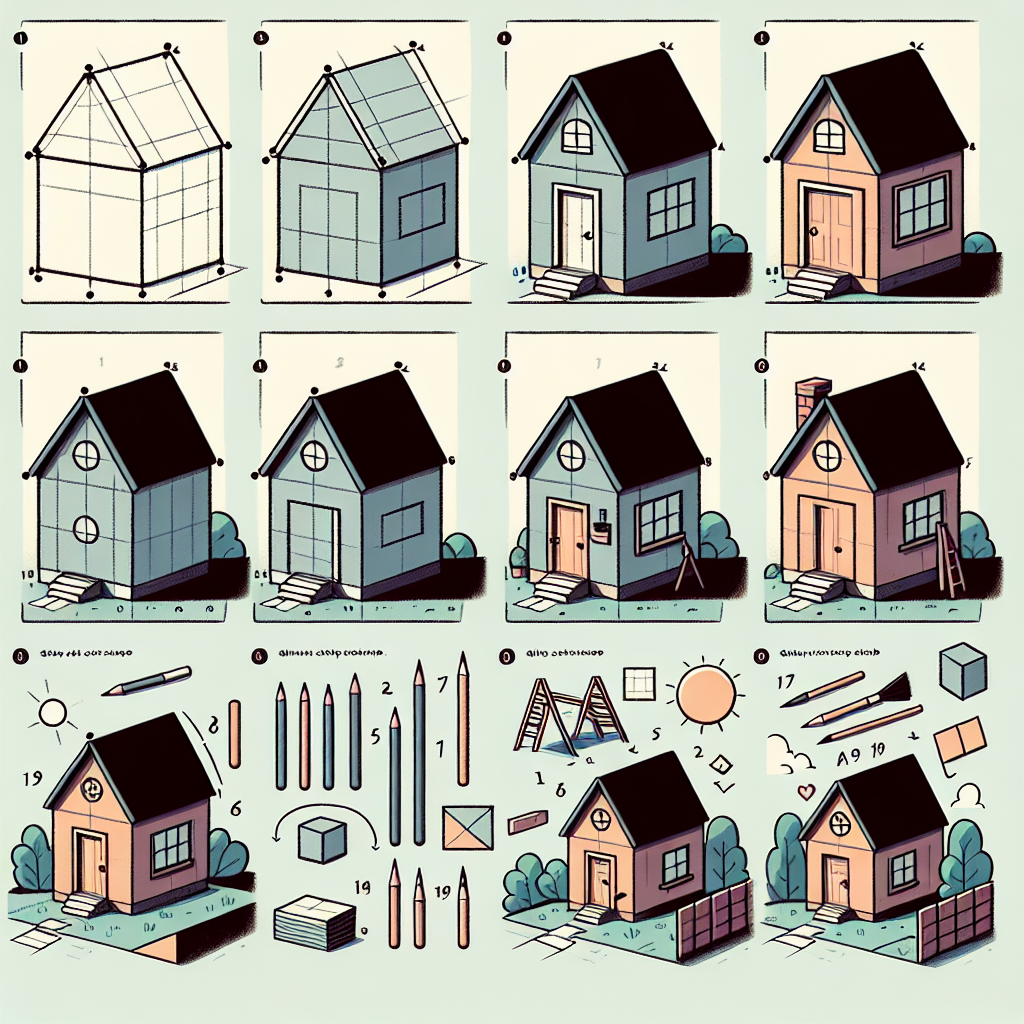
How to draw a small house
Introduction to Drawing a Small House
Drawing is a wonderful way to express creativity and imagination. Whether you’re a novice or have some experience, learning how to draw a small house can be a rewarding task. A small house is not only a great starting point for beginners but also serves as a lovely subject for more advanced artists. This article will guide you through the process step-by-step, providing tips and tricks along the way.
Gathering Your Materials
Before you begin drawing, it’s essential to have the right materials at your disposal. Different artists prefer various tools, but here are some basic supplies you will find helpful:
- Sketching paper
- Pencils (preferably HB and 2B)
- Eraser
- Ruler
- Colored pencils or markers (optional)
- Reference images (for inspiration)
Finding Inspiration
Before diving into the drawing process, it helps to gather inspiration from a variety of sources. Take a moment to browse through some illustrations of houses, magazines, or even real estate listings. You might come across different architectural styles or unique details that spark your creativity.
Types of Small Houses to Consider
Small houses come in various styles and shapes. Here are a few types to consider as you decide on what kind of house to draw:
- Cottage-style houses
- Modern minimalist homes
- Log cabins
- A-frame houses
- Beach huts
Step-by-Step Guide on How to Draw a Small House
Now that you’ve gathered your materials and found some inspiration, it’s time to start creating your small house masterpiece. Follow these steps for a straightforward approach:
Step 1: Draw the Basic Shape
Begin with light pencil strokes to create the basic shape of your small house. You can start with a simple rectangle for the main structure and add a triangle on top for the roof.
“Keep it simple at first. You can always add details later.”
Step 2: Adding the Roof
Once the basic shape is established, it’s time to outline the roof. Depending on the style, your roof might be slanted or flat.
- For a slanted roof, draw two diagonal lines extending from the top corners of the house shape and meet them at a peak.
- For a flat roof, simply draw a straight line across the top.
Step 3: Detailing the Exterior
Now, it’s time to bring your house to life with details. Consider adding:
- Windows: Draw rectangles or squares on either side of the house.
- A door: Create a vertical rectangle in the center lower portion of the house.
- Chimney: Add a small rectangle on the roof for a chimney.
- Siding: If your house has siding, sketch horizontal lines for texture.
Step 4: Landscaping and Surroundings
To create depth, you can add landscaping around your house. Here are some ideas:
- Grass or a garden in front
- Trees or shrubs on the sides or back
- Walkways leading to the front door
Step 5: Adding Finishing Touches
Once you’ve finished the basic outline and landscaping, it’s time to erase any unnecessary lines and clean up your drawing. You can now go over your final lines with a darker pencil or ink. If you’d like, you can also add color to your drawing:
- Select a color palette that complements your house.
- Color the house's walls, roof, windows, and any additional details.
- Consider shading to give your drawing more dimension.
Enhancing Your Skills
Like any skill, drawing takes practice. Don’t be discouraged if your first attempts aren’t perfect. Here’s how you can enhance your drawing skills:
- Practice regularly to improve your hand-eye coordination.
- Study different house styles to understand their structures.
- Experiment with different drawing mediums.
- Take a drawing class or follow online tutorials.
Conclusion
By following this guide on how to draw a small house, you’ve taken your first steps toward creating beautiful artwork. Remember, the key to improvement is practice and creativity. Don’t hesitate to explore your unique style and incorporate personal touches into your drawings. Happy sketching!
By Guest, Published on October 17th, 2024