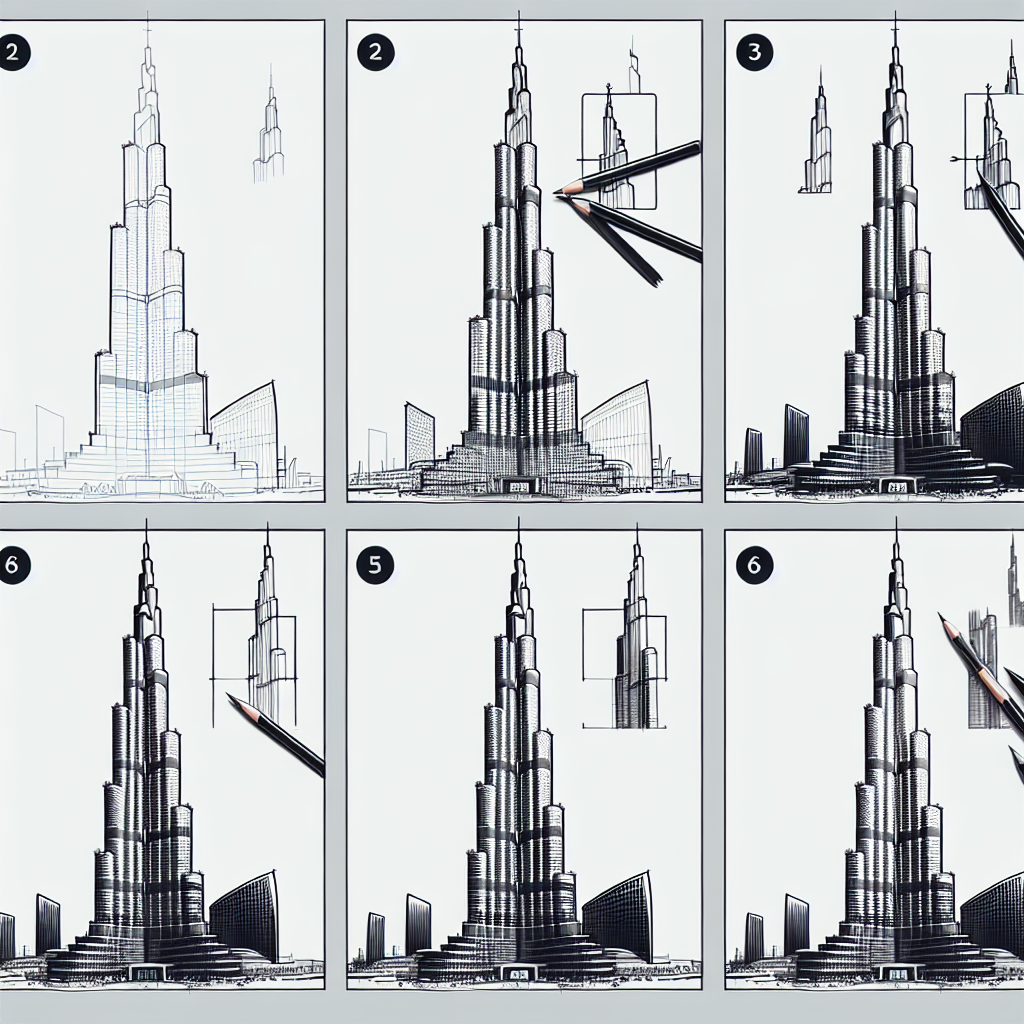
How to draw burj khalifa
How to Draw the Burj Khalifa: A Step-by-Step Guide
The Burj Khalifa, an iconic skyscraper located in Dubai, United Arab Emirates, stands as the tallest building in the world, reaching an astounding height of 828 meters (2,717 feet). Its stunning architectural design, combining traditional Islamic styles with modern construction techniques, makes it a favorite subject for artists. If you've ever wanted to recreate this architectural marvel on paper, follow this guide on how to draw Burj Khalifa.
Gather Your Supplies
Before you start sketching, it's important to gather all the necessary materials. Here’s what you’ll need:
- Pencil (preferably HB and a softer pencil for shading)
- Eraser (kneaded erasers work best for precision)
- Paper (sketch paper or a sketchbook)
- Ruler (optional but helpful for straight lines)
- Colored pencils or markers (for adding color later)
Understand the Structure of the Burj Khalifa
Before you start drawing, familiarize yourself with the Burj Khalifa's distinctive silhouette. The building tapers as it rises, with a series of setbacks that create its unique stepped profile. Here are key features to observe:
- **The Base**: The building has a broad, solid base that supports its height.
- **The Middle**: This section features the first setbacks and is relatively straight.
- **The Tapering Top**: The pinnacle of the building narrows dramatically at the top, resembling a spire.
Sketching the Outline
The first step in how to draw Burj Khalifa is to sketch the basic outline. Follow these steps:
- Start with the base. Draw a rectangle that reflects the width of the building at the bottom.
- Divide the rectangle vertically into three sections: the base, middle, and top.
- Using the vertical lines as guides, draw the outlines of the first and second setbacks. These should gradually taper upward.
- For the top, create a narrower shape that resembles a spire, ensuring it is centered.
Adding Details to Your Drawing
Now that you have the basic outline, it’s time to add intricate details that make your drawing stand out:
- **Windows**: The Burj Khalifa features numerous windows, particularly in the middle section. Use straight lines to draw horizontal and vertical lines to create the appearance of windows.
- **Balconies**: Some levels have protruding balconies that can be added to your design.
- **Lighting**: Consider adding small, angled lines at the peaks to represent the lights that illuminate the building at night.
Shading and Texturing
To give depth and realism to your drawing, shading is essential. Here’s how to do it:
- Identify light sources: Determine the direction from which your light is coming. This will help you know where to add shadows.
- Use a softer pencil to apply light shading on one side of the building, especially on the sections facing away from the light source.
- Blend gently using your finger or a blending stump for a smooth finish.
Add Color and Finishing Touches
Once you're satisfied with your shading and details, you can add color. Consider the following:
- **Base Color**: The Burj Khalifa is primarily a glassy silver, so light grey or a soft blue will suffice.
- **Reflections**: Use darker shades to create reflections on the glass surface, emphasizing the building's height and structure.
- **Sky Background**: Adding a background can enhance your drawing. Whether it’s a blue sky or a sunset, it frames the Burj Khalifa beautifully.
Final Review
Once you've finished adding color, take a step back and review your work. Here are some tips for the final touches:
- Check for any stray pencil lines and erase them gently.
- Make sure all the windows and details are distinct and properly aligned.
- If necessary, redefine the outlines with a fine-tipped pen for sharpness.
Conclusion
Drawing the Burj Khalifa can be a rewarding experience for both beginners and seasoned artists. Through careful observation, a focus on detail, and a bit of practice, you can capture the essence of this magnificent structure on paper. With this guide on how to draw Burj Khalifa, you now have a step-by-step process to create your masterpiece. Remember, practice makes perfect, so keep refining your skills, and you may surprise yourself with what you can create!
"Art is never finished, only abandoned." - Leonardo da Vinci
Showcase Your Work
Don't forget to share your creation! Whether it’s posting on social media or simply showing it to friends, sharing your artwork can inspire others and give you valuable feedback. Join art and drawing communities online to engage with fellow artists; you never know what tips and tricks you might learn!
Happy drawing!
```By Guest, Published on July 26th, 2024