How to make a fire pit with bricks
Creating a Beautiful Fire Pit with Bricks: A Step-by-Step Guide
Outdoor living spaces have become increasingly popular as people seek to extend their enjoyment of the great outdoors. One essential feature that adds warmth, ambiance, and functionality to any backyard is a fire pit. If you’re looking to enhance your outdoor area, learning how to make a fire pit with bricks offers a rewarding DIY project that you can complete over a weekend. This guide will walk you through the entire process, ensuring you create a safe and inviting space for gatherings with family and friends.
Benefits of Building a Brick Fire Pit
Before we get into the nitty-gritty of constructing your fire pit, let’s explore the benefits:
- Durability: Brick fire pits are sturdy and can withstand harsh weather conditions, making them a long-lasting addition to your outdoor space.
- Customizable: With a variety of brick types and colors available, you can create a design that complements your home and personal style.
- Increased Property Value: A well-designed fire pit can enhance the aesthetic appeal of your property, potentially increasing its market value.
- Versatility: Fire pits serve as perfect gathering spots for family and friends, whether for roasting marshmallows or sharing stories under the stars.
Safety Considerations
Before embarking on this DIY project, it’s essential to consider safety:
- Check local regulations regarding fire pits and burning materials.
- Choose a safe distance away from flammable structures, including your home, trees, and wooden fences.
- Ensure proper ventilation to avoid smoke buildup.
- Have a bucket of water, sand, or a fire extinguisher handy for emergencies.
Gathering Materials and Tools
To succeed in this project, you’ll need the right materials and tools. Here’s a comprehensive list:
Materials
- Bricks (firebricks recommended for the inner lining)
- Gravel or sand for the base
- Concrete (optional for added stability)
- Landscape fabric (to prevent weeds)
Tools
- Shovel
- Level
- Tape measure
- Safety goggles
- Gloves
- Brick hammer or sledgehammer
- Chalk or string for layout
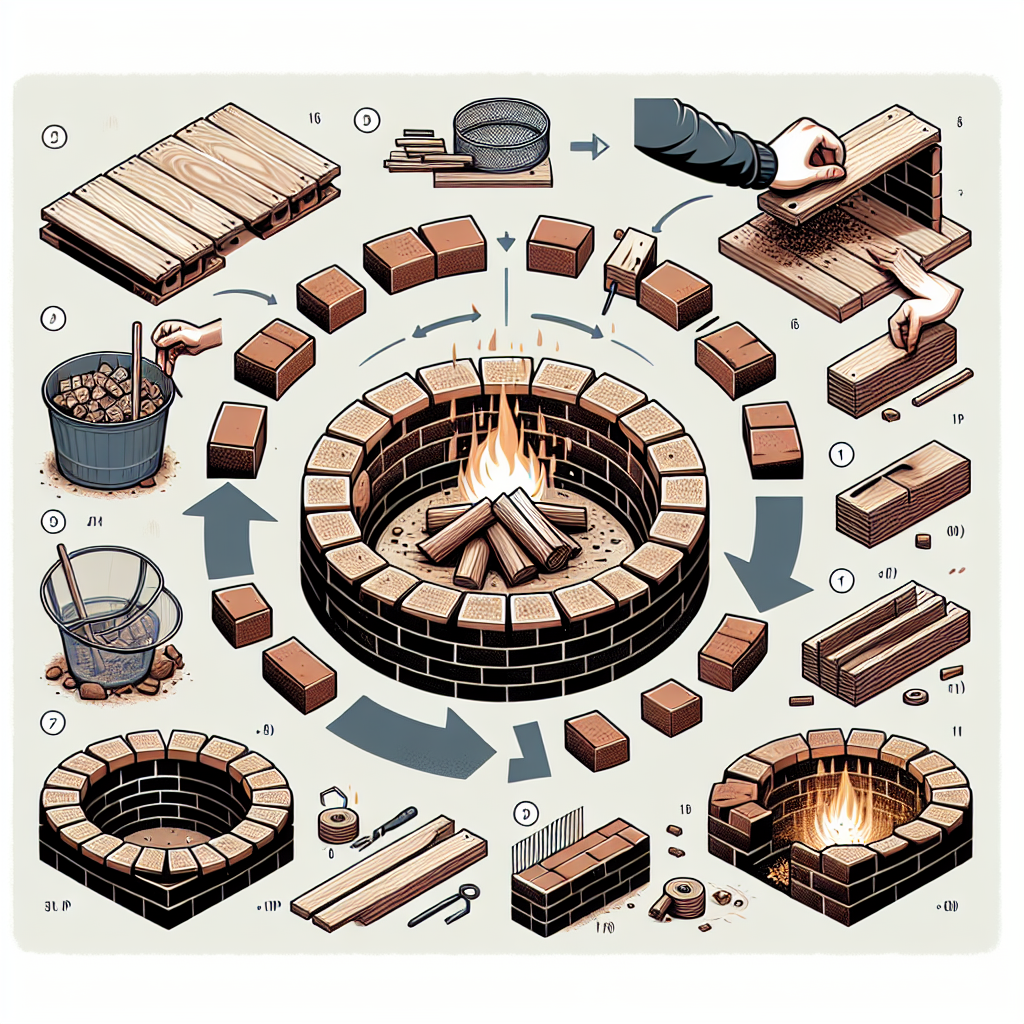
Step-by-Step Instructions on How to Make a Fire Pit with Bricks
Let’s dive into the steps required to create your brick fire pit:
Step 1: Choose the Right Location
Select a suitable location for your fire pit, considering the following:
- Provide enough space for seating around the pit.
- Avoid places with overhanging branches to minimize fire risk.
- Ensure it’s easily accessible and visible for social gatherings.
Step 2: Mark the Area
Once you’ve chosen a location, mark the outer diameter of your fire pit. A diameter of 3 to 4 feet is often ideal for family and friends to gather around:
- Use a tape measure to determine the center point.
- Measure outwards to mark your desired fire pit circumference.
- Use chalk or string to create the outline.
Step 3: Dig the Foundation
After marking the area, dig out a circular hole approximately 6-12 inches deep. This will serve as your fire pit base:
- Remove any grass or vegetation from the marked area.
- Ensure the base is level by using your level tool.
- Layer the bottom with 3-4 inches of gravel or sand for better drainage.
Step 4: Lay Down the Landscape Fabric
To prevent weeds from growing around your fire pit, lay landscape fabric over the gravel or sand:
- Cut the fabric so that it covers the entire foundation.
- Secure it with landscaping pins if necessary.
Step 5: Start Laying Bricks
Now comes the fun part—building the fire pit:
- Place the first layer of bricks around the edge, making sure they are snug against each other.
- Use the level to ensure the layer is even horizontally and vertically.
- Continue to add layers, staggering the joints (like a brick wall) for stability.
Step 6: Secure the Bricks
If desired, you can use mortar to secure the bricks in place. While not necessary, this adds durability:
- Apply mortar between the bricks as you lay them down.
- Use a trowel to smooth it out for a neat appearance.
Step 7: Create the Inner Wall
Consider using firebricks for the inner lining of your fire pit, which can withstand high heat:
- Follow the same process of laying bricks to create an inner circle.
- Ensure it's slightly shorter than the outer bricks for aesthetics.
Step 8: Finishing Touches
Once the brick structure is complete, it’s time to add the finishing touches:
- Fill any gaps with mortar, sand, or small pebbles for an aesthetically pleasing look.
- Consider placing steel mesh or grilling grates on top for cooking purposes.
- Add a seating area around your fire pit using outdoor furniture or logs.
Maintenance and Safety Tips
To ensure the longevity and safety of your new feature, consider the following maintenance tips:
- Regularly check for cracks or damage and replace bricks as needed.
- Clear away debris and ash after each use to maintain airflow.
- Use a cover to protect your fire pit from rain and snow during off-seasons.
- Follow local guidelines for fire safety, including burning restrictions on certain days.
Enjoying Your Fire Pit
Your brick fire pit is now complete! Here are some suggestions on how to enjoy it:
- Plan regular family nights around the fire to create cherished memories.
- Make s’mores or cook over the fire for fun outdoor meals.
- Use it as a cozy setting for winter evenings or summer nights.
Conclusion
Building a fire pit is a fantastic way to enhance your outdoor living space, providing a gathering spot for friends and family while also adding value to your property. By carefully following these steps on how to make a fire pit with bricks, you can create a safe, beautiful environment that will serve you for many years to come. Remember to always prioritize safety and enjoy the warmth and glow of your backyard haven!
By Guest, Published on October 6th, 2024