How to make a kitchen island out of base cabinets
How to Make a Kitchen Island Out of Base Cabinets
Creating a kitchen island can significantly enhance the functionality and aesthetic appeal of your kitchen. If you’re on a budget, one of the best approaches is to make a kitchen island out of base cabinets. Not only does this option save you money, but it also allows you to customize the island to fit your specific needs and style. In this comprehensive guide, we’ll walk you through everything you need to know, from planning to execution.
Understanding the Benefits of a Kitchen Island
A kitchen island serves multiple purposes in a home, functioning as a centralized workspace, a gathering place for family and friends, and an area for additional storage. Here are some key benefits:
- Increased Counter Space: An island provides extra surface area for food preparation, cooking, and serving.
- Storage Solutions: Base cabinets can be utilized to store kitchen essentials, freeing up space in your existing cabinets.
- Social Hub: Islands can act as an informal dining space or a place for social interaction while cooking.
- Design Flexibility: Making an island from base cabinets allows for custom designs that suit your kitchen layout and decor.
Planning Your Kitchen Island
Before diving into construction, proper planning is crucial. You'll want to consider the design, dimensions, and layout. Here are a few steps to help you get started:
Step 1: Measure Your Space
Start by measuring your kitchen area. Factor in pathways for walking and opening cabinet doors. Ideally, there should be at least 36 inches of clearance around the island. Consider the following:
- Available square footage
- Existing kitchen layout
- Placement of appliances
Step 2: Determine the Island Size
Decide the dimensions of your island based on the size of your kitchen and the function you want it to serve. A common size for a kitchen island is 4-5 feet long and 2-3 feet wide.
Step 3: Design and Style
Your island should complement the existing décor of your kitchen. Do you prefer a modern look or a rustic charm? Some popular styles include:
- Contemporary: Clean lines, minimalist design.
- Farmhouse: Warm woods, distressed finishes.
- Industrial: Use of metals, and reclaimed wood.
Gathering Materials
Once you have a solid plan in place, it's time to gather your materials. Here’s a checklist:
- Base Cabinets: Choose cabinets that fit your design and size requirements.
- Countertop Material: Options include granite, quartz, butcher block, and laminate.
- Hardware: Knobs, pulls, and hinges in line with your design theme.
- Tools: Drill, level, measuring tape, screws, and a saw.
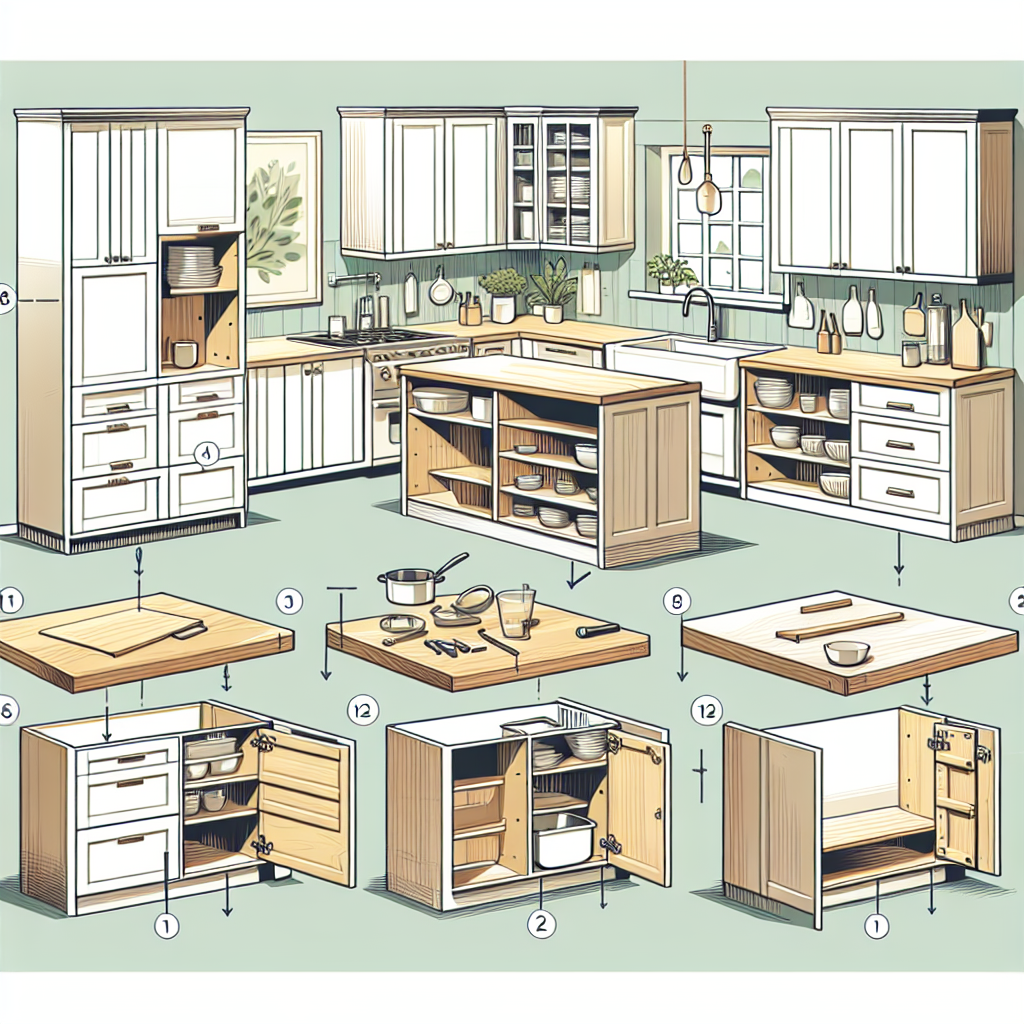
Building the Kitchen Island
With all your materials at hand, it’s time to start constructing your kitchen island. Follow these steps carefully for a successful build:
Step 1: Arrange the Base Cabinets
Begin by laying out the base cabinets in the configuration you’ve designed. Ensure they are level and adjust as necessary. If using multiple cabinets, ensure they’re securely fastened together.
Step 2: Secure the Cabinets
Use screws to attach the base cabinets to each other and to the floor for stability. Check with a level to make sure everything is even.
Step 3: Add the Countertop
The countertop sits atop the base cabinets, providing a flat working surface. Depending on your material choice, you may need an adhesive or screws. Follow the manufacturer's guidelines for installation.
Step 4: Install Hardware
Attach the cabinet pulls and knobs according to your aesthetic preference. Ensure they’re aligned and properly installed for a polished look.
Step 5: Finishing Touches
Touch up any paint or finish required on the cabinets. If desired, you can also add decorative elements such as a backsplash or decorative supports to enhance the appearance of your island.
Electrical and Plumbing Considerations
If you plan to incorporate electrical outlets or a sink, here are a few important points to consider:
Electrical Installations
Adding outlets on your kitchen island provides convenient access for appliances. It's crucial to hire a licensed electrician to install electrical work safely and in compliance with local codes.
Plumbing Installations
If you plan to include a sink, consider the plumbing requirements:
- Ensure water supply lines are available.
- Consult a plumber to connect to your existing system.
- Consider proper drainage solutions to prevent backups.
Decorating Your Kitchen Island
Your kitchen island can serve as a focal point in your kitchen. Here are a few ideas for decorating your newly constructed island:
- Bar Stools: Select stylish stools that match the overall design.
- Candle Holders: Create a warm ambiance with decorative candles.
- Cookbooks and Utensils: Keep your favorite recipe books and utensils on display.
- Fresh Herbs: Place pots of fresh herbs for a lively kitchen touch.
Maintaining Your Kitchen Island
To keep your island looking good and functional, consider these maintenance tips:
- Regular Cleaning: Wipe surfaces with appropriate cleaners.
- Check for Wear: Inspect the cabinets and countertops for signs of wear.
- Touch-up Paint/Finish: Perform touch-ups as needed to keep your island looking fresh.
Conclusion
Building your kitchen island out of base cabinets not only enhances your kitchen’s utility, but it also offers a tailored fit to your space. As you plan and execute your project, remember to consider your design preferences, functional requirements, and the overall aesthetics of your kitchen. By adhering to this guide on how to make a kitchen island out of base cabinets, you’ll create a masterpiece that you can cherish for years to come.
By Guest, Published on August 19th, 2024