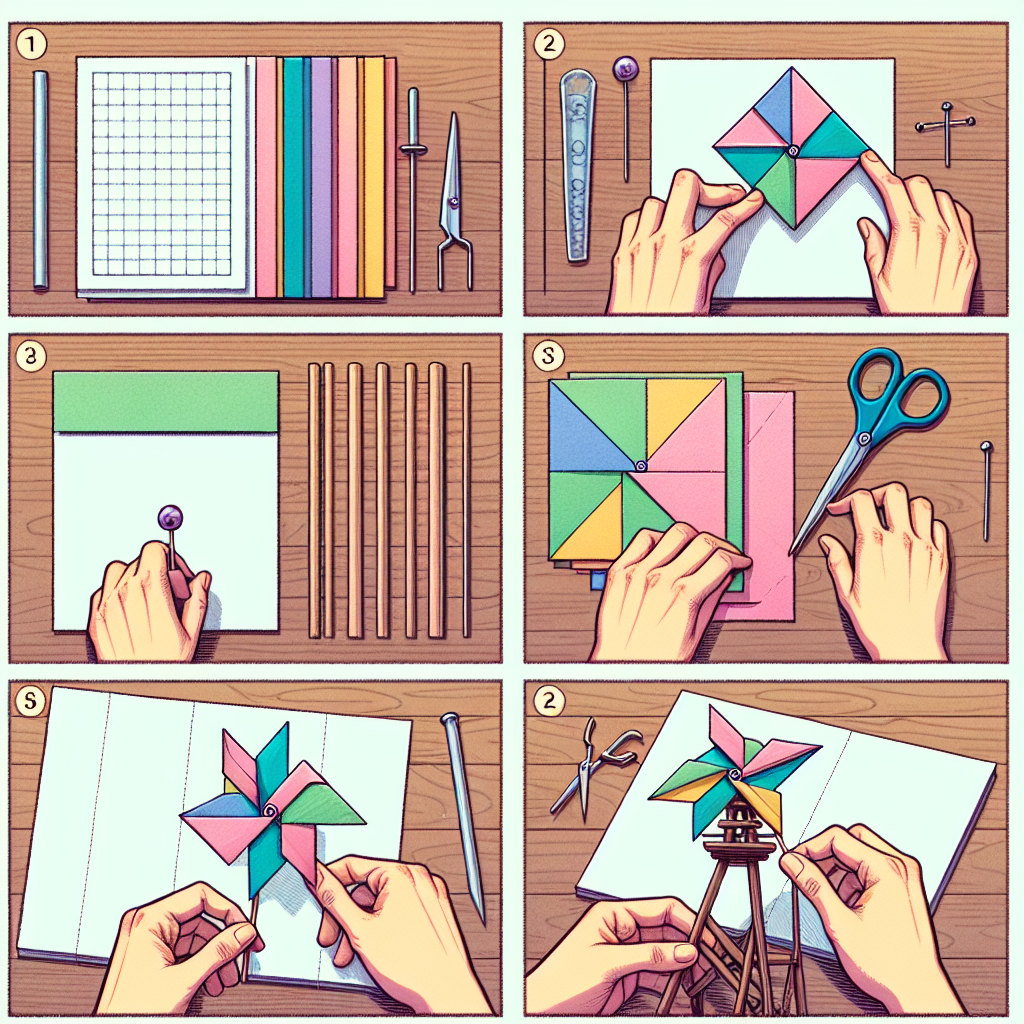
How to make a paper windmill
Creating a Whirlwind of Fun: How to Make a Paper Windmill
Making a paper windmill is a delightful and easy craft project that both children and adults can enjoy. Not only does it serve as a fun activity, but it also provides an opportunity to learn about motion, wind energy, and even basic engineering principles. Whether for a school project, a fun afternoon activity, or a unique décor item, this colorful spin toy captures the imagination. In this guide, we will walk through the process step-by-step, ensuring that you can easily create your own delightful windmill.
Materials You Will Need
Before diving into the crafting process, gather the necessary materials to ensure a smooth experience. Below is a list of items you will need:
- Colored paper or cardstock (template printable optional)
- Scissors
- A pencil
- A straight pin or a push pin
- Straw or wooden dowel for the base
- Glue or tape (optional)
- Ruler
- Marker (optional for decoration)
Step-by-step Instructions
Now that you have all your materials, let’s proceed with the steps on how to make a paper windmill. Each step is essential to ensure your windmill operates smoothly and spins effortlessly!
Step 1: Prepare Your Paper
For the windmill’s blades, you can either draw your own windmill blade template or print one from online resources. If you opt to draw, follow these instructions:
- Use the ruler to measure a square — 6 inches by 6 inches works well for a standard windmill.
- Lightly sketch a square on your colored paper or cardstock.
- Next, draw diagonal lines from each corner to the center, creating four triangular sections within the square.
Step 2: Cut Out the Template
Carefully use scissors to cut along the lines of the square and the diagonal cuts. Stop cutting about 1 inch from the center, allowing the triangles to remain attached at the center of the square. This section will be crucial for spinning!
Step 3: Prepare the Windmill Blades
With your paper now cut into four blades, it’s time to shape them for optimal spinning.
- Gently fold each triangle towards the center without creasing too much. Make sure the top point aligns with the center point of the square.
- Keep the triangle tips held in the center with one hand while stabilizing the paper with the other hand.
Step 4: Attach the Blades to the Pin
To secure your blades and allow them to spin, follow these steps:
- Take the push pin or straight pin and carefully pin through the center of the paper windmill where all the triangle tips meet. Make sure not to poke yourself!
- Then, push the pin into the straw or wooden dowel. This will serve as the windmill's handle and allow airflow around the blades.
Step 5: Creating a Base
To ensure your windmill stands tall, you need a solid base. There are a couple of different approaches you can take:
- Simple Cup Base: Fill a small cup with sand or soil, and insert the straw or wooden dowel into the center. This base provides stability and keeps your windmill upright.
- Weighted Base: If you desire a more durable windmill, consider attaching the dowel to a piece of cardboard, securing it with glue or tape, and then weighting it down with stones or heavy books.
Step 6: Putting Everything Together
Now, you can finalize your windmill by ensuring everything is attached correctly. Adjust the windmill blades as needed to ensure they can turn freely. Test your windmill by blowing gently on it or placing it in a breezy area.
Tips for Customization
Once you’ve mastered the basics of how to make a paper windmill, consider customizing it to stand out. Here are some ideas to inspire your creativity:
- Paint: Use markers, paint, or stickers to decorate the blades before assembling for a personalized touch.
- Choose Different Paper: Experiment with different textures and colors of paper to create delightful variations.
- Add Details: Consider adding small embellishments such as beads or glitter to enhance the visual appeal.
- Make a Theme: Create mini windmills that fit a holiday theme, such as using colors associated with holidays like Halloween or Christmas.
Understanding the Science Behind Windmills
While making a paper windmill is an enjoyable craft, it also provides a unique opportunity to discuss scientific principles. Here, we explore what makes the windmill spin and how it ties into real-world applications:
How Wind Energy Works
Windmills are more than just charming decorations; they embody the concept of converting kinetic energy from the wind into mechanical energy. When air flows over the blades, it creates lift and thrust thanks to their shape and arrangement. Here’s a brief comparison of how various windmills function:
| Type of Windmill | Function |
|---|---|
| Traditional Windmill | Used for grinding grain or pumping water. |
| Modern Wind Turbine | Generates electricity for homes and industries. |
Applications in Everyday Life
The principles embodied in your simple paper windmill reflect broader uses of wind energy in today’s world. Wind turbines, larger versions of windmills, harness wind power to generate renewable energy. As people become more aware of environmental issues, interest in wind energy solutions continues to grow.
Conclusion
Making a paper windmill is not just a fun and crafty project, but it also provides a platform for learning about science, design, and creativity. With just a few materials and steps, you can create your own spinning masterpiece. It’s an excellent way for kids to engage with nature through crafting while sparking conversations about energy and engineering. Now that you know how to make a paper windmill, gather your supplies, unleash your creativity, and watch your windmill come to life, spinning joyfully in the breeze!
Whether for educational purposes, family bonding, or decoration, paper windmills can bring a whirlwind of enjoyment into your life.
By Guest, Published on August 10th, 2024