How to make a tank
Building Your Own Tank: A Step-by-Step Guide
Creating a homemade tank is a fascinating project that combines engineering with creativity. Whether you're a model-making enthusiast, a DIY warrior, or simply looking for an exciting new challenge, learning how to make a tank can engage your skills like no other. In this guide, we'll break down the steps, materials needed, and tips for crafting your own mini tank model.
Understanding the Basics of Tank Design
Tanks are one of the most powerful land combat vehicles, known for their armored protection and mobility. Before diving into the actual building process, understanding the components and design of a tank is essential.
- Chassis: The base structure that provides support and stability.
- Turret: A rotating part that houses the main armament.
- Treads: The tracks that help the tank move across various terrains.
- Armor: The protective plating that shields the interior from enemy fire.
Each component of a tank plays a significant role in its overall functionality. For a basic model, you’ll want to focus on the chassis and turret, adding details as you gain confidence.
Materials You’ll Need
Gathering the right materials is crucial for successfully building a tank model. Here's a comprehensive list to get you started:
- Base material (such as plastic, wood, or metal)
- Wheels or treads
- Glue (strong adhesive or epoxy)
- Paint and detailing supplies
- Tools (scissors, knife, ruler, and cutting mat)
Optional items can enhance your model, such as additional decorative elements or functional components like moving parts.
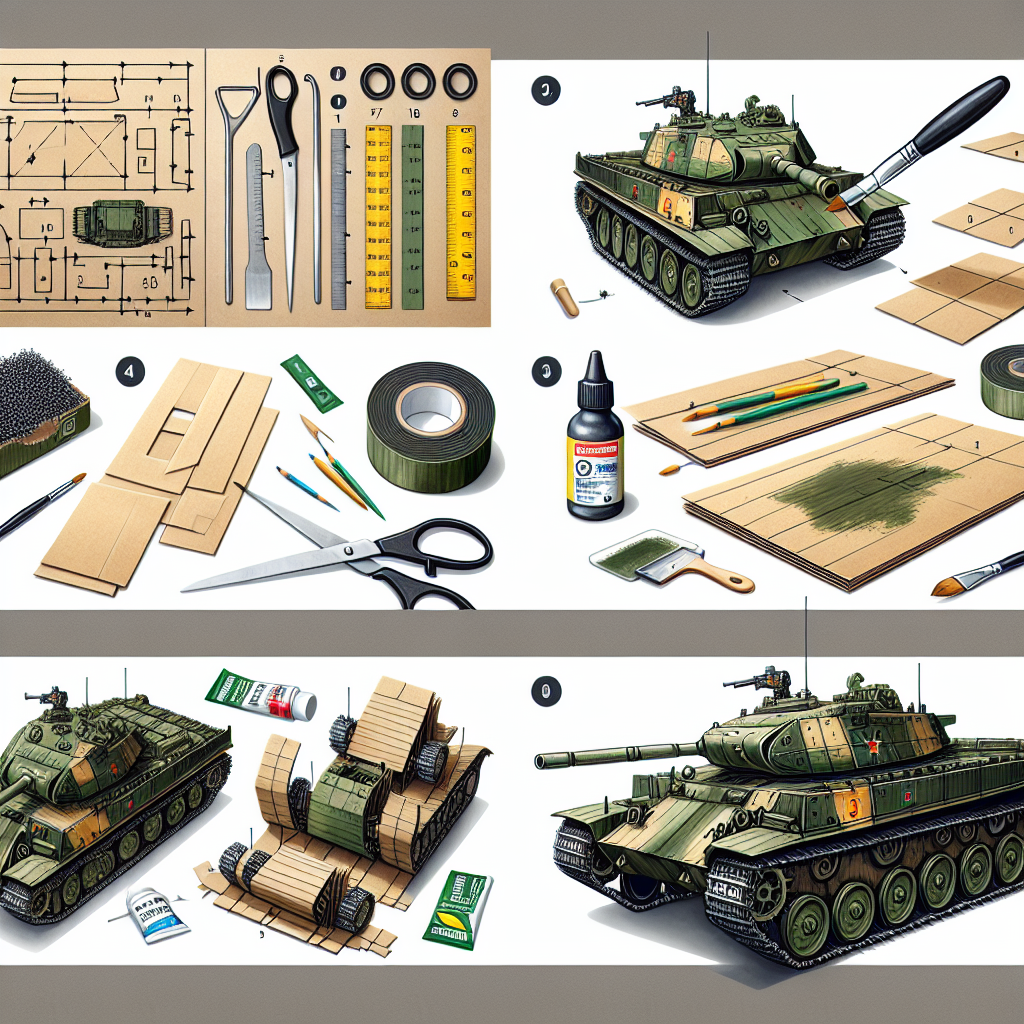
Step-by-Step Guide on How to Build a Tank
Follow these steps to build your own tank model:
- Design Your Tank: Sketch your tank design on paper. Consider the size and proportion of the chassis in relation to the turret.
- Cut Out the Chassis: Using your base material, cut out pieces for the tank’s body. Make sure to leave space for the treads.
- Build the Turret: Cut a circular piece for the turret and create a rectangular piece for the barrel. Attach them using glue.
- Add Treads/Wheels: Attach the treads or wheels to the bottom of your chassis, ensuring they can rotate if you want a moving model.
- Assemble Everything: Glue the turret onto the chassis, ensuring it can rotate. Secure all pieces firmly.
- Paint and Detail: Once the glue has dried, paint your tank and add any other details you desire.
These steps serve as a foundational framework. As you become more confident in your building skills, feel free to innovate and customize your design!
Enhancements and Custom Modifications
Once you have mastered the basics of building a tank, there are several enhancements you can consider for added realism and functionality:
- Lighting: Incorporate LEDs for headlights or other effects.
- Remote Control: Consider adding a remote control mechanism for mobility.
- Sound Effects: Adding realistic sounds can make your tank feel more authentic.
These additional features can transform your model from a simple replica to an impressive, engaging piece of craftsmanship.
Tips for Success
Building a tank model can be both enjoyable and challenging. Here are some tips to help you succeed:
- Take your time: Rushing can lead to mistakes. Give yourself the time needed for careful work.
- Research real tanks: Look at images and videos of real-world tanks for inspiration.
- Join a community: Engage with other model builders through forums or local clubs to share ideas and techniques.
Possible Challenges and Solutions
As with any DIY project, you may encounter some challenges along the way. Here are common issues and their solutions:
| Challenge | Solution |
|---|---|
| Poor adhesion between parts | Ensure surfaces are clean and use a stronger adhesive if needed. |
| Uneven weight distribution | Reassess your materials; ensure the balance on your chassis. |
| Inaccurate dimensions | Double-check all measurements before cutting materials. |
Conclusion: The Reward of Creating Your Own Tank
There you have it! By following the steps outlined above, you can learn how to make a tank that not only looks great but also serves as a testament to your skills and creativity. Remember, the fun lies in the process, so enjoy every moment spent designing and building your tank model!
Whether you keep it as a display piece, enter it into competitions, or use it in games, the satisfaction of completing your project will be well worth your effort. Share your experiences, tips, and finished models with the ever-growing community of DIY enthusiasts!
By Guest, Published on August 27th, 2024