How to build a paver patio
How to Build a Paver Patio: A Comprehensive Guide
Building a paver patio is a rewarding project that can enhance the beauty and utility of your outdoor space. In this article, we will explore the essential steps and considerations for creating a stunning paver patio that will last for years to come. Whether you're an experienced DIYer or a beginner, this guide will provide you with the necessary information to get started.
Benefits of a Paver Patio
Before diving into the steps on how to build a paver patio, it's important to understand why paver patios have become a popular choice among homeowners:
- Durability: Pavers are designed to withstand harsh weather conditions and heavy foot traffic.
- Low Maintenance: Unlike wood or concrete, paver patios require minimal upkeep, making them a practical choice.
- Aesthetic Appeal: Available in various shapes, sizes, and colors, pavers allow for creative designs that complement your landscape.
- Versatility: Paver patios can be used for various applications, including walkways, driveways, and pool areas.
Materials You’ll Need
Before you begin your project, gather the necessary materials. Here is a list to help you prepare:
- Pavers (brick, concrete, or natural stone)
- Base material (crushed stone or gravel)
- Sand (for leveling and joint fill)
- Edging material (plastic or metal edging)
- Compactor (rented or borrowed)
- Shovel and rake
- Level
- Rubber mallet
- Landscape fabric (optional)
- Measuring tape and chalk line
Planning Your Patio Design
To begin, you need to envision what your paver patio will look like. Here are some key considerations when planning your design:
- Patio Size: Measure the area where you want to install the patio. Be sure to leave enough room for furniture and walking paths.
- Shape: Do you want a rectangular, circular, or custom shape? Sketch out your design on paper or use design software.
- Style: Consider the style of your home and landscape. Choose pavers that complement your surrounding environment.
Preparing the Site
Preparation is crucial for the longevity of your patio. Follow these steps to prepare the site:
- Mark the Area: Use string, stakes, or spray paint to outline the dimensions of your patio.
- Excavate the Area: Remove grass, plants, and topsoil to a depth of about 6-8 inches.
- Ensure Proper Drainage: Create a slight slope away from your home to facilitate water runoff.
- Compact the Base: Use a compactor to create a solid base, helping to prevent shifting over time.
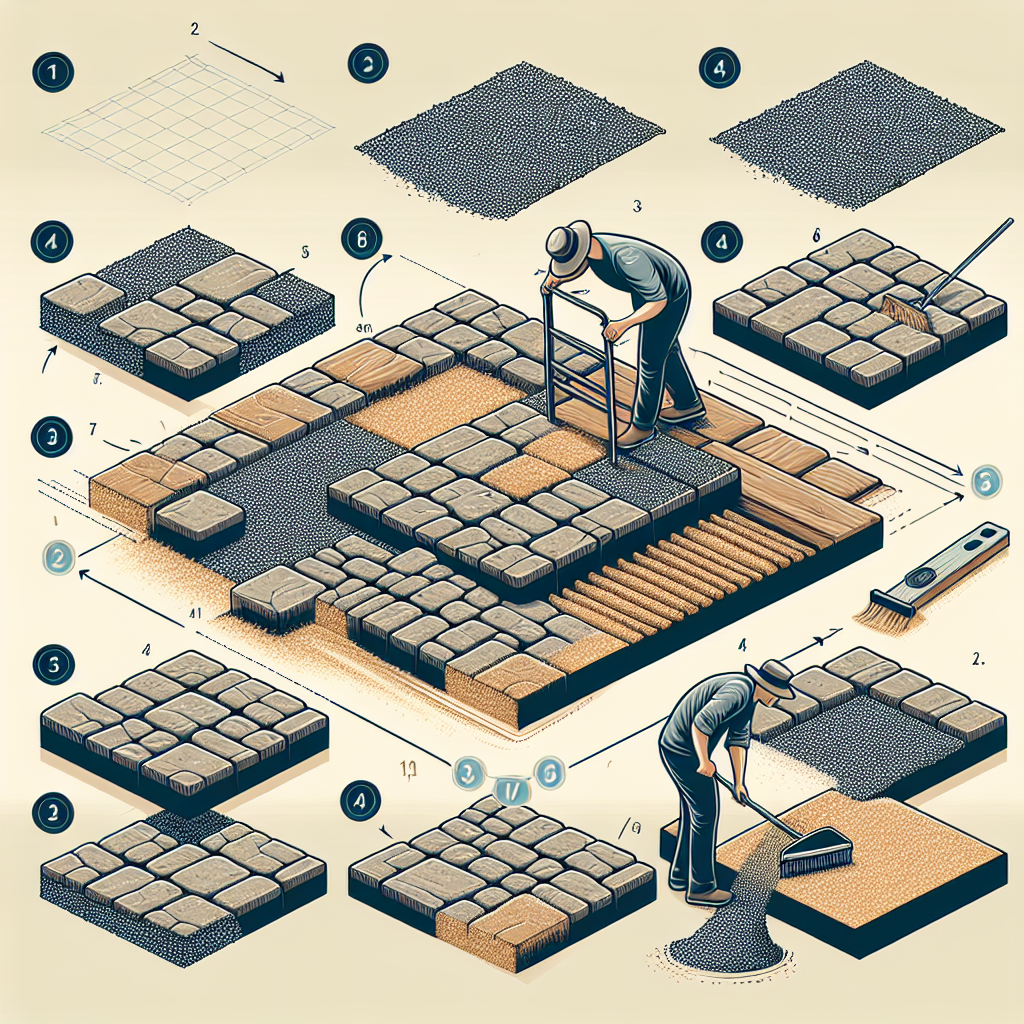
Installing the Base Material
The base layer is critical for the stability of your paver patio. Follow these steps:
- Add Base Material: Pour an even layer of crushed stone or gravel to the excavated area, about 4-6 inches thick.
- Level the Surface: Use a rake to distribute the base material evenly and a level to ensure a flat surface.
- Compact Again: Use the compactor to compress the base material, creating a stable layer.
Adding the Sand Layer
Next, you’ll want to add a layer of sand, which will serve as a bedding for your pavers:
- Spread Sand: Pour a 1-inch layer of sand over the compacted base.
- Smooth It Out: Use a rake to spread the sand evenly, then use a level to check for flatness.
- Compact Again: Lightly compact the sand layer to create a stable surface.
Laying the Pavers
Now comes the exciting part—laying the pavers! Here's how to do it:
- Start at a Corner: Begin laying pavers from one corner, working your way outward.
- Use a Rubber Mallet: Tap each paver into place with a rubber mallet to ensure they are set snugly in the sand.
- Follow Your Design: Be mindful of the pattern you want to create, whether it be a herringbone, basketweave, or straight lay.
- Leave Gaps: Ensure there are small gaps between the pavers for sand filling.
Filling the Joints
Once your pavers are laid, it’s time to fill the joints to lock everything in place:
- Spread Joint Sand: Pour sand over the entire patio, filling the gaps between the pavers.
- Brush It In: Use a broom to sweep the sand into the joints, ensuring they are thoroughly filled.
- Compact Again: Lightly compact the pavers to ensure they settle and the sand fills the spaces.
- Repeat if Necessary: Add more sand as needed and repeat the brushing and compacting.
Finishing Touches
Now that your paver patio is complete, it’s time to add some finishing touches:
- Install Edging: Place edging material around the perimeter to keep the pavers in place.
- Clean the Surface: Sweep away any excess sand or debris to reveal your beautiful new patio.
- Add Decor: Enhance the ambiance with outdoor furniture, planters, or decorative lighting.
Maintenance Tips
To keep your paver patio in excellent condition, consider these maintenance tips:
- Regular Sweeping: Sweep away leaves and debris to prevent staining and mold growth.
- Weed Control: Keep an eye out for weeds and remove them as needed.
- Seal When Necessary: Consider applying a sealant every few years for added protection and to enhance color.
Conclusion
Building a paver patio is an enjoyable project that adds value and beauty to your home. By following the steps outlined above and putting in the time and effort, you can create a durable and aesthetically pleasing outdoor space. Remember to plan carefully, prepare the site thoroughly, and maintain your patio for years of enjoyment. Happy building!
By Guest, Published on September 19th, 2024