How to make cardboard house easy
How to Create an Easy Cardboard House: A Step-by-Step Guide
If you’re looking for a fun project that combines creativity and practicality, making a cardboard house is a fantastic idea. Not only is it budget-friendly, but it also allows for immense artistic expression. In this article, we’ll explore how to make cardboard house easy, guiding you through the steps you need to take to create your very own cardboard abode.
Why Choose Cardboard for Your House Project?
Cardboard is a versatile material that offers several benefits for crafting projects like building a house. Here are some compelling reasons to choose cardboard:
- Affordability: Cardboard is inexpensive and often available for free from packaging materials.
- Accessibility: Most people have cardboard boxes at home, making it easy to start your project without any special materials.
- Recyclable: Using cardboard is an environmentally conscious choice as it can be recycled once you're done with your project.
- Creative Flexibility: Cardboard is easy to cut and assemble, allowing for custom designs and structures.
Gather Your Materials
Before diving into the construction of your cardboard house, it’s important to gather all the necessary materials. Here’s a list of items you’ll need:
- Cardboard boxes (varying sizes)
- Box cutter or scissors
- Ruler or measuring tape
- Pencil or marker
- Glue or tape (strong adhesive preferred)
- Paints and brushes (optional for decoration)
- Decorative items (stickers, colored paper, etc.)
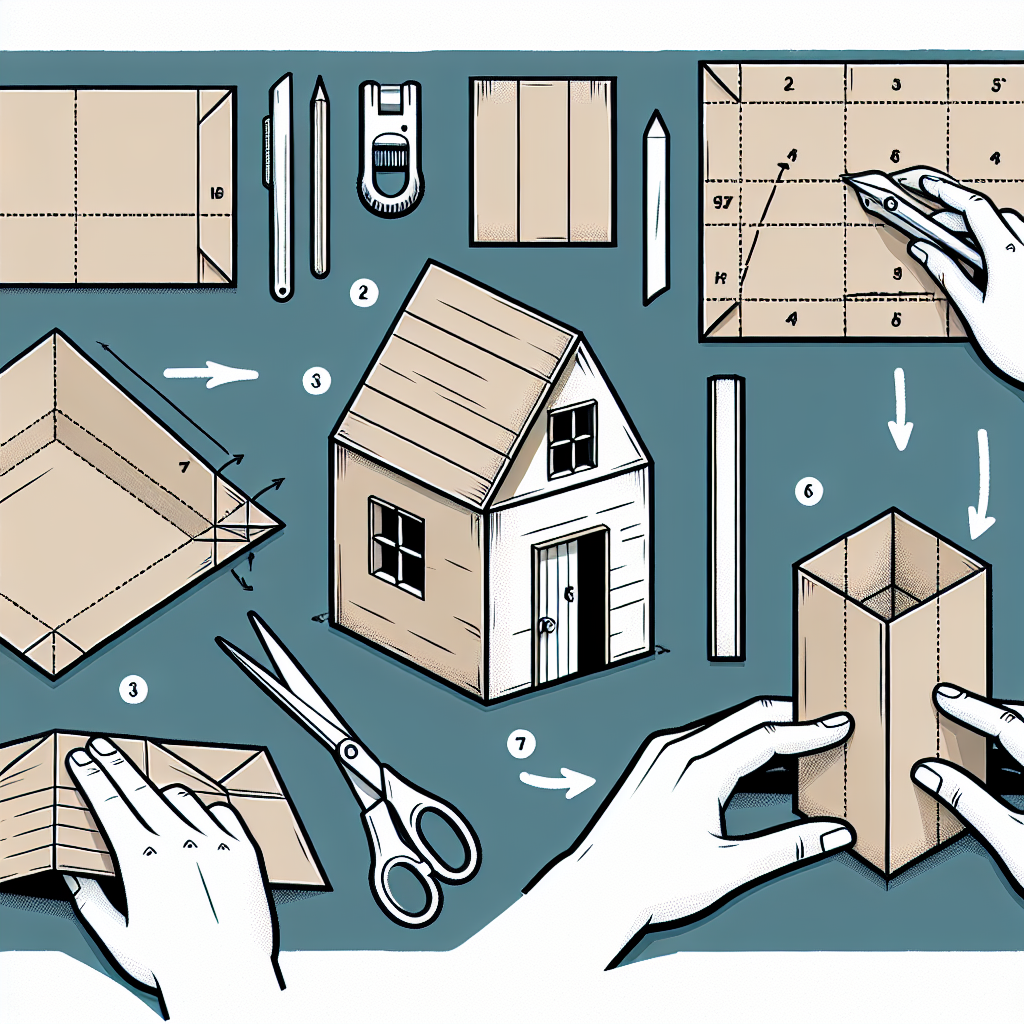
Step-by-Step Instructions on Building Your Cardboard House
Now that you have your materials ready, it’s time to start building! Below is a straightforward guide on how to make your cardboard house.
Step 1: Designing Your House
The first step in your project is to plan the design of your cardboard house. Consider the following:
- Decide the size of your house based on the cardboard you have available.
- Sketch the basic layout, including walls, roof, and windows.
- Think about how many rooms or levels you want to include.
Step 2: Cutting the Cardboard
Using your design as a blueprint, start cutting the cardboard pieces. Here are some tips to ensure precision:
- Use a ruler to measure straight lines for walls and roofs.
- Use a box cutter for clean and even cuts, but be careful and ensure a stable surface.
- Cut out windows and doors by marking their positions on the cardboard before cutting.
Step 3: Assembling the Walls
Once all your pieces are cut, it’s time to start assembling the walls:
- Begin with the base of your house. Lay out the walls and secure them using glue or tape.
- Make sure corners are aligned properly to create a sturdy frame.
- Allow the glue to set for a few minutes before proceeding to the next step.
Step 4: Adding the Roof
The roof not only adds a finishing touch to your house but also helps hold the structure together:
- Cut out two identical pieces for the roof, or a single piece if you prefer a flat rooftop.
- Attach the roof segments to the top of the walls, ensuring a snug fit.
- Secure the roof in place with glue or tape, similar to the walls.
Step 5: Enhancing with Windows and Doors
Now that the structure is assembled, you can create windows and doors:
- Cut out holes for windows and doors if you haven’t done so yet.
- Add additional cardboard pieces to create frames for windows and doors.
- Consider using colored paper or clear plastic for window panes.
Step 6: Personalizing Your Cardboard House
This is where the fun begins! You can personalize your cardboard house in numerous ways:
- Painting: Use acrylic paint to add color and personality to your house.
- Decorating: Glue on decorative items like stickers, fabric scraps, or even small objects for added character.
- Landscaping: If you want to create a miniature environment, use more cardboard to make trees, gardens, and furniture.
Useful Tips for Your Cardboard House Project
To ensure that your project goes smoothly and your cardboard house turns out beautifully, keep the following tips in mind:
- Be patient and allow glue to dry fully before moving on to the next steps.
- Work on a clean and flat surface to avoid damaging the cardboard during assembly.
- Engage children or friends in the project for a fun and collaborative crafting experience.
Conclusion: Enjoying Your Cardboard House
Creating a cardboard house is a rewarding project that offers hours of creativity and fun. Take your time to build, decorate, and personalize your house, making it a reflection of your unique style.
So now that you know how to make cardboard house easy, gather your supplies and get crafting! Whether you are a child or an adult, the joy of constructing something from scratch can be a remarkable experience. Share your finished creation with others, and don’t hesitate to experiment with different designs in the future!
"Creativity is intelligence having fun." - Albert Einstein```
By Guest, Published on August 17th, 2024