How to make liquid soap
How to Make Liquid Soap: A Complete Guide
Creating your own liquid soap at home can be a rewarding and cost-effective endeavor. Not only does it allow you to customize the scent, consistency, and ingredients, but it also gives you control over what you use on your skin. In this guide, we’ll unearth the intricacies of crafting liquid soap, providing you with easy-to-follow steps, tips, and additional insights. Let's dive deep into the world of soap making!
The Benefits of Making Your Own Liquid Soap
- Customization: You can choose scents, colors, and textures that appeal to you.
- Quality Control: You monitor the ingredients, ensuring they are skin-friendly and free from harmful chemicals.
- Cost-effective: Making your own soap can save money in the long run.
- Eco-friendly: You can use sustainable ingredients and reduce plastic waste by using refillable containers.
Ingredients You'll Need
Before we embark on the how to make liquid soap process, it's essential to gather the right ingredients. Here’s a basic list:
| Ingredient | Purpose |
|---|---|
| Lye (Sodium Hydroxide) | Used to saponify oils, turning them into soap. |
| Distilled Water | To dissolve the lye. |
| Liquid Oils (e.g., olive, coconut, or castor oil) | Base for your soap, providing moisture. |
| Essential Oils | Add fragrance and potentially therapeutic properties. |
| Colorants (optional) | For aesthetic enhancement. |
Safety Precautions
“Always remember: Safety first when working with lye!”
Making liquid soap involves the use of lye, which is caustic and can cause severe burns. Here are safety precautions to consider before starting:
- Wear gloves and goggles to protect your skin and eyes.
- Work in a well-ventilated area.
- Keep vinegar nearby to neutralize any lye spills.
- Never add water to lye; always add lye to water.
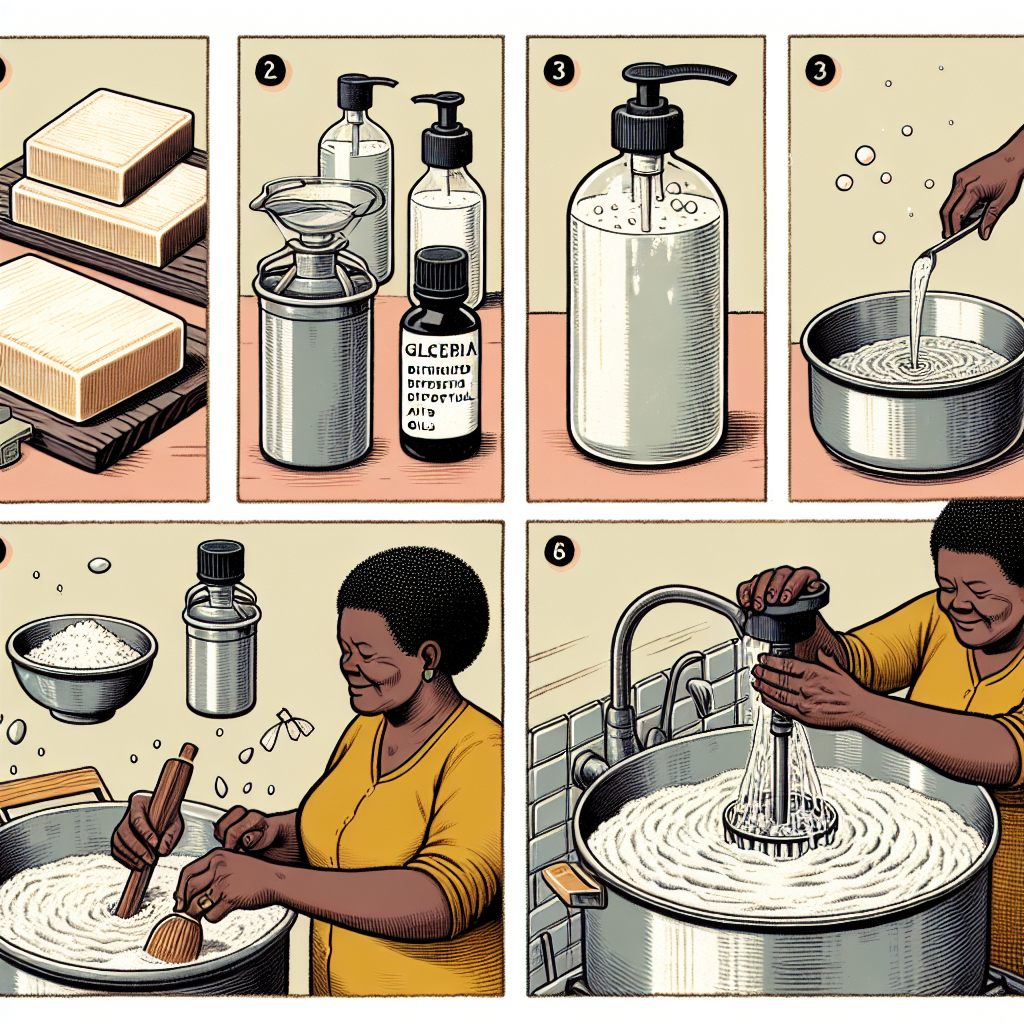
How to Make Liquid Soap: Step-by-Step Guide
Now that we’ve covered the basics, let’s dive into the step-by-step process of how to make liquid soap.
- Prepare Your Workspace: Clear your kitchen or workspace of any clutter. Lay down newspapers to protect surfaces.
- Measure the Ingredients: Use a digital scale to measure your lye and oils accurately. Precision is crucial!
- Dissolve the Lye: In a glass container, measure distilled water and slowly add the lye. Stir gently until dissolved. This mixture will heat up quickly, so be cautious.
- Heat the Oils: In a separate pot, heat your oils until they reach around 100-110°F (38-43°C).
- Combine Lye and Oils: Once both mixtures are at the same temperature, carefully pour the lye solution into the oils. Use a stick blender to mix until you achieve a light trace (a pudding-like consistency).
- Cook the Soap: Transfer the mixture to a slow cooker. Cook on low for about 1.5 to 2 hours, stirring occasionally. The soap will become gel-like.
- Add Fragrance and Color: Once the soap has reached the desired consistency, you can add essential oils and any colorants if desired. Stir well.
- Thin the Soap: Add distilled water to achieve your preferred consistency. The amount may vary depending on personal preference and the type of oils used.
- Cool and Bottle: Let the liquid soap cool completely. Once cooled, pour it into clean, sterilized bottles.
Tips for Perfect Liquid Soap
Crafting liquid soap can sometimes be tricky. Here are some tips to enhance your soap-making experience:
- Start with a recipe designed for beginners.
- Experiment with small batches until you get the desired results.
- Keep your workspace organized to prevent any accidents.
- Consider using a pH strip to test your soap before using it.
- Label your bottles with the date and ingredients for future reference.
Common Mistakes to Avoid
Even seasoned soap makers can make mistakes. Here’s what to watch out for:
- Not measuring ingredients accurately.
- Forgetting safety gear.
- Adding lye to water instead of the other way around.
- Not allowing the soap to cure properly before use.
Storing Your Liquid Soap
Proper storage of your homemade liquid soap is crucial to maintaining its integrity and longevity. Here are some tips:
- Use dark or opaque bottles to protect the soap from light.
- Store in a cool, dry place away from direct sunlight.
- Keep out of reach of children and pets, as the lye is hazardous until fully saponified.
Frequently Asked Questions
Can I use any type of oil for my liquid soap?
Not all oils are suitable for making liquid soap. Liquid oils like olive, coconut, and castor work best, while solid fats tend to be more challenging.
How long does it take for the soap to cure?
Liquid soap does not require the same curing time as bar soap. However, it’s recommended to let it rest for at least a few days before using it to allow evaporation of excess water and to promote the development of the desired lathering properties.
What if my soap is too thick?
You can add a bit more distilled water to thin out the mixture to your desired consistency. Just ensure to mix it thoroughly.
Conclusion
Learning how to make liquid soap is a valuable skill that combines creativity, practicality, and a touch of science. Whether you’re looking to avoid harsh chemicals, create thoughtful gifts, or simply enjoy a new hobby, homemade liquid soap offers endless possibilities. With the right ingredients, safety precautions, and a bit of patience, you’ll soon be on your way to crafting your own luxurious liquid soap. Happy soap making!
```By Guest, Published on August 3rd, 2024